Pages

Showing posts with label chocolate. Show all posts

Friday, November 21, 2014

Baby Boy Shower decor!

Last weekend I helped plan a baby shower for a good friend who is expecting a boy. You would think we're starting our own boys club here since we now have about 10 boys and growing among our play group and just 4 girls!

I was in charge of decorations, games, and party favors. And if it isn't already evident here here and here that I love party planning, you can check out below some small simple ideas I used to make the shower fun! I absolutely love Pinterest, because I can always find some sort of free printable page if not great inspirational ideas to work off.

Firstly, for decorations I had the photobooth props leftover from my Valentine's party last February and figured the mustaches and bow ties worked for a baby boy shower. I also found some adorable chalk print signs we used for the photo booth courtesy of The Phillips Family blog. Then I found a template for making a onesie banner, it was perfect for the simple yet adorable look I was going for. Michael's was having a sale on their craft paper 6/$1 so I grabbed a bunch that went with our theme and put my scissors to work. I liked how on the original design they had used clothes pins to hang the onesies like hanging baby's clothes to dry. But, upon finding that clothes pins are ridiculously over priced and won't ever be used again I went with a simpler option: Punch holes through the onesies and thread the ribbon through. 

courtesy of BottleYourBrand Blog

Next were the party favors. I just could not decide what I wanted to do! In the end since I'm a huge chocolate fan and so are most of the girls who attended the shower; I indulged in our sweet tooth. I filled the favor bags with chocolate truffles and also made some baby shower themed chocolate candy using a Wilton melts template I had at home. Michael's also has a baby shower section where they had a bag of 'It's a boy' themed Hershey's kisses. I tried finding some cute baby themed favor tags for a reasonable price but the ones at the dollar store were cheap looking and Michael's was too over priced. So I made my own using extra paper I had got for the onesie banner. I love when I can recycle ideas! I found at Michael's the chalk print stickers on sale for just $.89, originally like $3! Then I added a few more cute baby boy themed bottle and rattle stickers to tie it all in to the theme.  


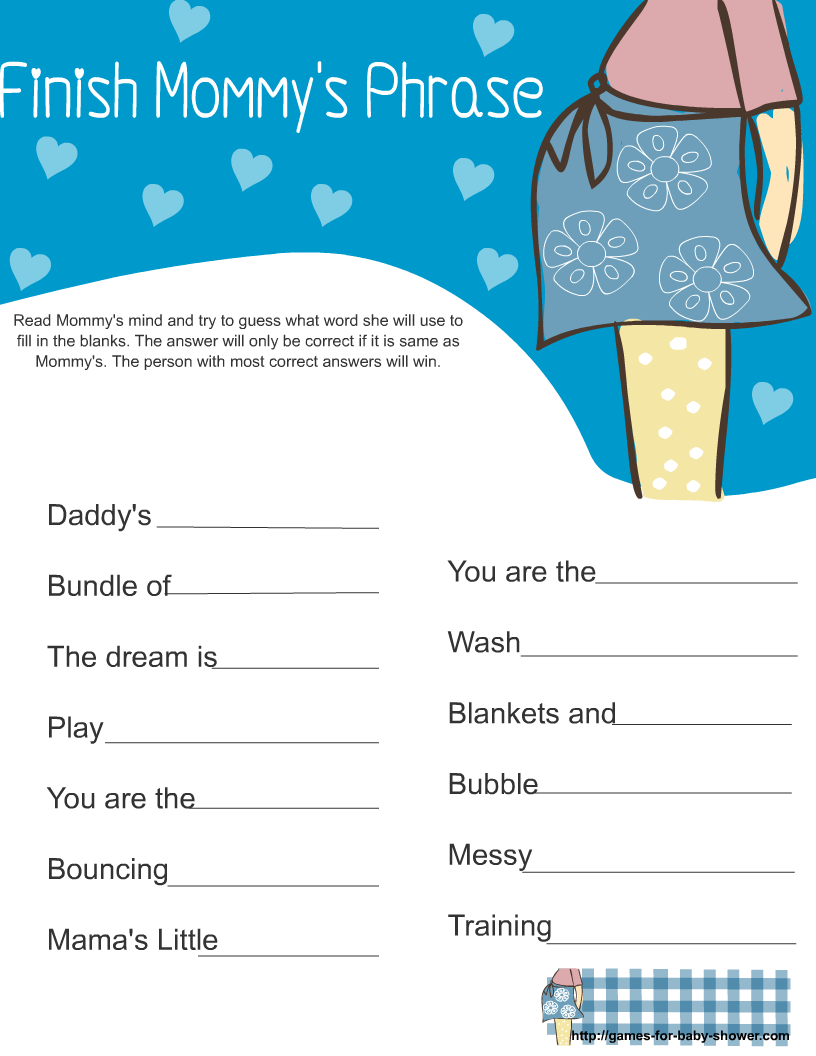
A pretty important part of baby showers are the games! To keep it fun without going too crazy we decided to play three games. 1) Design a Onesie 2) Guess Mommy's Answers 3) A-Z baby words. We had a lot of kids at the party and it just wasn't practical to play any relay race baby food feeding games and frankly none of us wanted to do that anyway! The first game was a fun arts and crafts activity that the kids helped with too. I had the girls decorate onesie templates I printed out using stickers, crayons, colored pencils and the extra patterned sheets I had gotten from Michael's. They wrote a small message to mommy and baby on the back so she could later add these to the baby's book and I had mommy be the judge for the Best Onesie Design which won a prize. While everyone was working on the first game I had mommy fill out her own answers for the second game. Even though the first game took more time, the other two were quick and fun to see what wacky words everyone came up with! For the Baby ABC's instead of matching mommy's words again, I gave everyone 1 minute 30 seconds and whoever had the most correct baby related words won.
via Poshtart Parties
     

via Google Search 'Baby Shower games'

Lastly, I decided no shower is complete without a diaper cake! Using unused diapers from my own shower cake earlier this year, some baby themed ribbon from the dollar store (way cheaper than Michael's and they even had 'it's a boy' ribbon) and a bag of rubber bands to roll up the diapers, it took me just one of Adam's naps to complete this cake! To decorate it I got a classic rattle and found some cutie booties and a teddy bear around the house. Diaper cakes are fairly simple to make, but just to be prepared I watched this video before I started.


Voila! 

our photo booth station


You know I love me some chalkboard!


It was a potluck so we ended up having a huge variety of some pretty delicious dishes!!

Tuesday, February 18, 2014

Pinterest Inspired Party!


At the beginning of February I held a lunch at my place for a couple of friends I've met in the few months since we've moved here. Between all our mini trips out of town and our two trips to NJ, I hadn't had a chance to invite anyone over and I took this as an opportunity to put to work some of the great party ideas I had been pinning on Pinterest. Also, since the Superbowl and Valentine's Day are February's two major occasions I figured I'd try to incorporate them in some way. 


My party was on Saturday before the Superbowl, but none of us girls really care much at all about football so the only way I chose to incorporate the Superbowl was in the menu. Superbowl parties are known to have some great appetizers and snacks that no one can resist, not even someone as apathetic towards football as myself! My two tributes to the Superbowl were cheeseburger sliders and buffalo chicken dip with pita chips. My friend Neda (who has a great makeup blog Here) made this AH-MAZING buffalo chicken dip for us a few times that I couldn't wait to try myself. It was really so simple to make and it's one of those snacks everyone keeps eating throughout the party. 

The rest of my party menu was: Cajun Shrimp Pasta (SO GOOD, I had none left!), Kale Quinoa Salad (which turned out amazing yet again. You know a salad is good when people willingly take it home with them!!), and bruschetta

Didn't have a chance to take a better picture of these
Now to include Valentine's Day into my party I tried my best not to go crazy on pink, red and hearts but its nearly impossible for me to not go overboard with anything. I tried to find sweet yet subtle items. For example, I made German chocolate cupcakes with a coconut vanilla frosting which I dyed pink using food coloring and I baked them in a silicon heart shaped cupcake pan I got from Target a few years ago, seen in this post. I also found some adorable items in the $1 section of Target which I couldn't resist. Like a small felt hearts banner, which was used as the backdrop to our photo booth. Instead of doing the usual sodas for drinks, I had (store bought) pink lemonade and put frozen berries to keep the drinks chilled. It was hard to keep away from all the overload of Valentine's day since I love themed parties SO much, but I realize just using a few themed ideas was a good way to go about it without seeming like cupid threw up all over everything.


'Pinspired' Ideas:

Mason Jars! I've been seeing these on Pinterest for a long while now, and I did my best to not fall into the trap of liking something just because it's popular, but seriously they are SO cute looking! They really added a chic feel to the party. By serving pink lemonade in them with a striped paper straw it caught everyone's attention since as something out of the normal soda in a glass way to serve drinks.  I got mine at Walmart 12 for $9 and the paper straws were from Target's party decor section, I think 20 for $2. 


Photobooth ideas are all over Pinterest. Originally I thought to make my own props, but when Target had a whole bag full of them for just $5, how could I turn it down? ;) I kept it simple with just a banner against our white wall and since we had a bunch of kids at the party, it kept them busy for a solid 15 minutes while we were able to take a gazillion adorable pictures of which maybe 3 came out nice. I liked this idea because it gave us something different to do than the usual munching and chatter without being too involved like playing organized games. 


Fruit Cones are such a simple yet fun way to make dessert look classy! Since I had some pretty heavy items on my lunch menu for the healthy eater I thought these fruit cones were a nice dessert alternative, plus the kids even liked how pretty they made the fruit look and were happy to snack on them.


Okay so I only partly tried to keep dessert healthy. Because when I saw these S'mores Brownies on Pinterest, all self control was lost. They were definitely a gluttonous addition to my dessert menu but one I do not regret. Ok maybe a little. Just imagine sweet gooey melted marshmallows sandwiched between a decadent chocolate brownie with a layer of crunchy graham cracker thrown in! I swear I have no self control. But they're SO worth trying!
bubbly, ooey, gooey marshmallow goodness!


Also, my husband is a Valentine's baby and as you may remember from my post last year I tend to get super cheesy with my ideas to celebrate his big day. So this year was no different. I turned to my beloved Pinterest for ways to surprise him. He grew up outside of America and is a HUGE fan of international chocolate bars. I'd seen some adorable cards using candy bars but I knew they wouldn't work for him since he's not really into Snickers, Mr Goodbar etc. I started leaving him little messages all week with chocolate bars attached, next to his keys or in his laptop bag and then on his actual birthday I gave him the card with a whole bunch added on. I forgot to take pictures of the ones from earlier in the week but it was something like 'Thanks for not being a FLAKE, you're an awesome husband and a great dad. We love you' and 'Hey Handsome, the AERO of my heart points to you!'


Now that Ali is old enough to understand birthdays, I had him make a present for his Baba too. Of course the idea was Pinterest inspired and it worked out pretty nicely. I bought poster paper and paintbrushes from the dollar store and Crayola washable paint from Target for $4, which we had LOADS of fun painting with in the bathtub afterwards. My advice is to practice the hand and footprint first on regular paper so you get the hang of it, before you attempt it on the actual poster. It was a fairly cheap craft with a result that looks so stinkin' adorable; we're planning to get a nice frame for it to put up in Ali's room.

Lastly, I tried to make these adorable strawberry roses and here is where the phrase "Pinterest Fail" comes to mind. They weren't as easy as they looked and definitely very time consuming. I was only able to get 3 done before I realized my husband wouldn't wait more than 3 seconds to devour them and he couldn't care less how his strawberries look, but he does love them dipped in chocolate! Lesson learned. I thought my plate looked cute and the hubster was certainly impressed with all of my creative attempts. 


Hope you guys enjoyed reading all these crazy Pinspired ideas I put to work and they've inspired you to try out some of your own! 


Tuesday, February 11, 2014

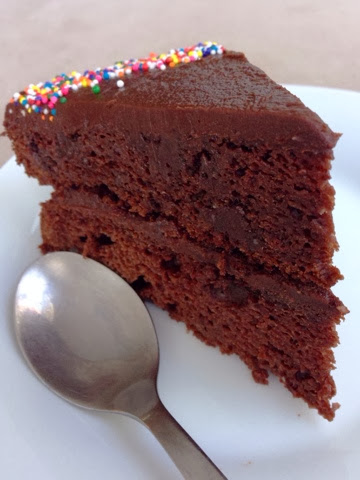
Recipe: Ultimate Chocolate Cake with Fudge frosting

I cannot believe how long its been since I last wrote here. I knew life was going to get busy in the new year, I just didn't realize exactly how busy it was going to be!

I have so many posts in my drafts right now which eventually I hope to post up. Even before 2013 ended we did some projects around the home, reupholstering our dining chairs and re-staining bookshelves. Once I got back from my cousin's wedding in NJ we took a trip to Atlanta (right before they got hit with a pretty serious snow storm!). Then, I hosted my first get together with a few friends I've made here using some awesome Pinterest party ideas for inspiration! And last weekend we finally made a trip out to Disneyworld, where I made my first attempt at DIY Tshirt making! So stay tuned because I have plenty to share with you all!


In the spirit of Valentine's week I'm posting up this UH-mazing chocolate cake I made. My husband's birthday happens to fall on Valentine's Day, so usually I end up spoiling him with goodies rather than the other way around. Fortunately, we are both major chocoholics so its a win win! I love how moist this cake turns out, due to the Secret Ingredient.

Recipe Sourced here: Ultimate Chocolate Cake with Fudge frosting

Your key to a super soft cake!


Because you can never really go wrong with sprinkles, use them to add some pizzazz 


Enjoy!


Wednesday, October 09, 2013

Recipe: Zucchini carrot bread with chocolate chips and walnuts


I have a serious problem. I can't stop baking. 

This week I started intense potty training with Ali. He'll be 3 in December and I am hopeful to have him trained by his birthday. We're doing the cold turkey method, no pull ups. It's supposed to be the most effective and quick which it has proven to be, but it also is the most exhausting, mentally draining and is a likely candidate for extreme forms of torture. Let's just say I did NOT need to be baking while trying to accomplish this task. 

So despite a serious backache from all the bending down to clean and jerking out of the way to avoid being sprayed on it's been a decently successful few days. He's learned to keep his number twos in the toilet and number ones are getting better. Enough toilet talk. I know that's not why you came here. 

This recipe is a bit more involved than others I've attempted before, mostly because of the added step of grating zucchini/carrots and that probably took me longer as I did it while running back and forth between the kitchen and bathroom. Nonetheless, it came out tasting pretty delicious and my chocolate loving husband/child have already devoured more than half of it (IN ONE DAY). This is a great way to get picky eaters to have their veggies without knowing it! 

I also used baby carrots not whole carrots (gasp unhealthy I know, I like the taste of chemicals what can I say) and grating those is a torturous task in itself. I would say you could barely taste the carrot so maybe using real carrots is better? Or just use more? You try it and tell me!

Again, I like to tamper with recipes online to make my own so this is a blend of 1 2 and 3. 
Ingredients
  • 1 cup vegetable oil
  • 1½ cups granulated sugar
  •  1 cup brown sugar
  • 3 large eggs
  • 1 tablespoon pure vanilla extract
  • 2 ¾ cups all-purpose flour
  • ½ teaspoon salt
  • 1 teaspoon baking powder
  • 1 teaspoon baking soda
  • 2 tablespoon ground cinnamon
  • 1 teaspoon ground nutmeg
  • 1 cup grated carrots
  • 1½ cups grated zucchini
  • ½ cup walnuts
  • ½ cup chocolate chips


Instructions
  1. Preheat oven to 350 degrees. Oil and flour 2 loaf pans.
  2. In a large bowl, whisk together oil, sugar, eggs, and vanilla until fully combined and slightly lightened in color.
  3. In a medium bowl, stir together flour, salt, baking powder, baking soda, cinnamon, and nutmeg. Whisk flour mixture into sugar mixture until fully combined. Add in the grated carrots and zucchini and walnuts. Stir until evenly distributed.  
  4. Divide batter evenly among the loaf pans. Top with chocolate chips and more chopped walnuts, I also like to top with a little brown sugar to give it a crunch. Bake for 45 minutes on lower rack, rotating halfway through if necessary. Turn off stove and leave in oven to cool for 5-10 minutes to ensure it is cooked through.
  5. Cool loaves in pans about 20 minutes before gently and carefully removing. Bread may be stored in an airtight container at room temperature for up to 4 days, or frozen, wrapped in parchment and foil and placed in a zipper bag for 4 months. 


Eggplant Parmesan

Oh and I nearly forgot to mention that I also made Eggplant Parm for dinner. Because I've totally lost my mind. Peeling the skin then slicing and bread crumbing the eggplant, its just all so much more time consuming than ordering pizza, which I probably should have done.  But the end result really was worth it. 

Attempt this when you have a solid 1-1.5 hrs on your hands. 

We bake, not fry, our eggplant slices  which makes me want to believe this is a healthy recipe but it tastes SO darn good to be called that. 

I'm too tired to write out the whole thing, but they do a good job of that Here. To add in more veggies I threw some frozen broccoli and sliced mushrooms into the canned tomato sauce. Also, while I put the eggplant slices to bake I roasted 3 garlic cloves on the side, then crushed and added them into my sauce. Wow does that pack in flavor or what! Hubs better get ready for roasted garlic everything.


I left my dish in for longer since I love me some burnt cheese topping but you can probably pull it out once the cheese starts to bubble. 


And since I clearly cant sit still for an idle moment, I leave you with a depiction of what I did with most of our time spent in the bathroom this week:
Filed under things you discover in the toilet - Ali's momma is a Play-Doh artist!
 Homemade fondant cakes here I come!

Tuesday, September 17, 2013

Chocolate Banana Raspberry Bread

As you can tell from my previous post, while hubs was away on a work trip I had WAY too much time on my hands. Since he loves dessert I wanted to make him something special when he got back. We also had bananas in the house which were way beyond my liking to eat. Normally I've always made this amazing Banana Walnut Bread which comes out incredibly moist, but since we were out of walnuts but had an abundance of raspberries I thought I'd alter it around a bit. The outcome? Heaven, pure heaven.

Ingredients:
2 cups flour
1 teaspoon baking powder
1/4 teaspoon salt
1 egg
1 cups sugar
1/2 cup (1 stick) melted butter
2 tablespoons greek yogurt
1 teaspoon vanilla extract
4 ripe medium-large bananas, mashed
1/2 cup raspberries (mashed) and a handful whole to add on top
1/2 cup chocolate chips (to preference)
1/4 cup brown sugar

All the ingredients necessary (one extra egg added by mistake, lets pretend it never happened)
Directions:
Preheat oven to 350. Grease a 9x5x3 loaf pan and dust with flour.
Blend the flour, baking powder, and salt; set aside.
Mix the egg, sugar, and butter until combined.
Add the flour mixture to the egg mixture and when blended, add the yogurt, vanilla, raspberries, and mashed bananas; mix well.
Fold 1/2 cup of chocolate chips and pour batter into prepared loaf pan.
Sprinkle the batter with remaining 1/4 cup of brown sugar and stick in whole raspberries to give it a nice look on top.
Bake for 45 minutes until a toothpick comes out clean.

Separate Dry ingredients and wet
Combine everything to a 'thicker than pancake but not as thick as oatmeal' mixture
I had more batter than could fit in my pan so I made my favorite, Muffins!

fluffy gooey fruity goodness